How to Do Cricut Maker 3 Setup: Full Connection Guide

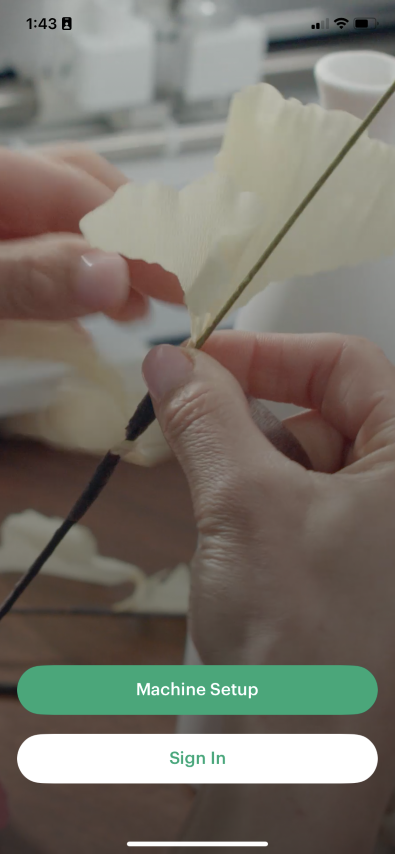
If you are looking for an ultimate crafting machine to make your DIY projects, then Cricut Maker 3 is definitely the one. Cricut machines are one of the best tools for crafting your DIY projects at home. If you are here, reading this blog, that means you are searching for the Cricut Maker 3 setup. You are new to the world of crafting and have bought your first cutting machine, or you have already been using Cricut machines and have updated to the latest machine. In either case, you are going to learn everything you need to know in this blog post.

All about Cricut Maker 3

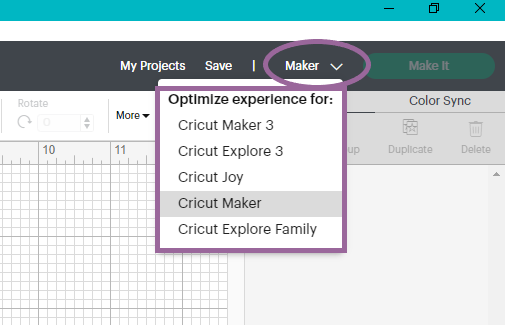
Cricut Maker 3 is the latest cutting tool in the Cricut Maker series. It has the capability of cutting more than 300+ different materials, including paper, vinyl, cardstock, fabrics, leather, cardboard, balsa wood, and many more. Cricut Maker 3, like other cutting machines, is a good tool if you want to cut and create your designs and projects. With the help of this Cricut machine, you can design almost everything from greeting cards to wooden signs and tote bags. You can design your own T-shirts or other clothes as well.

Before looking for a Cricut Maker 3 setup, you will need stable internet and an operating system like a computer or mobile device to use the Design Space app. This machine is great for making your own projects, but if you want, you can use it for business purposes as well.

What Do I Get in the Cricut Maker 3 Box?

In the box, almost all the needed equipment is given. You can use them to craft your project. But if you want extra tools for your project, you can buy them online from Cricut’s official website or any third-party site. When you open the box, these are the items you get in it:

  • Cricut Maker 3
  • A USB cable
  • Power adapter
  • Fine point blade
  • Some sample materials
  • Free trial of the Cricut Access plan

Cricut Maker 3 Setup on Your Device

Setting up a Cricut cutting machine is simple and easy. All you have to do is follow the basic steps in the section below. Once you unpack your machine and have checked that all the necessary items are there, you are ready to go for setup. You should download the Cricut Design app from the device you are using. Carefully follow the instructions written below, and your machine will be setup:

  1. Once you finish unboxing the machine, you must put it in a safe place; make sure the place’s surface is flat.
  2. Next, plug the machine into the wall socket using the power adapter that comes in the box.
  3. Now, you have to connect the machine to your computer or mobile using a USB cable or Bluetooth.
  4. After that, download the Design Space app.
  5. Then, you will see New Machine Setup in the app.
  6. Moreover, select the Cricut model from the list.
  7. Follow the instructions displayed on the screen.
  8. Finally, you can use your Cricut cutting machine for crafting.

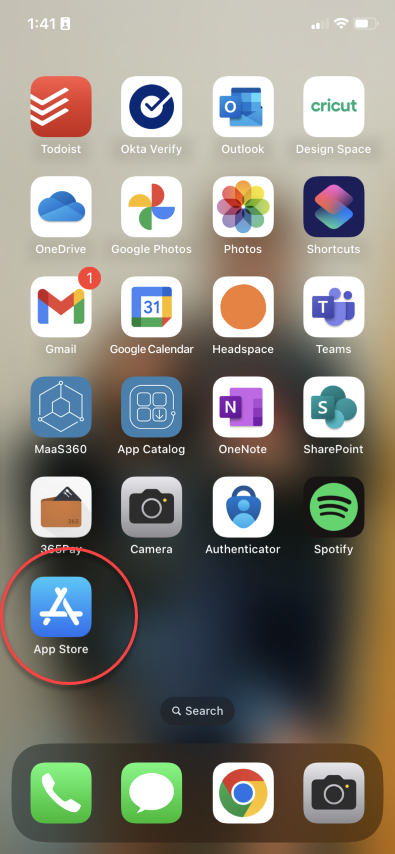
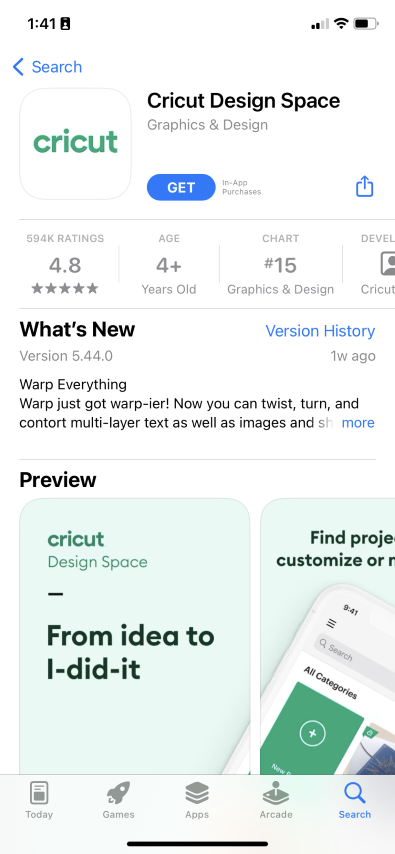
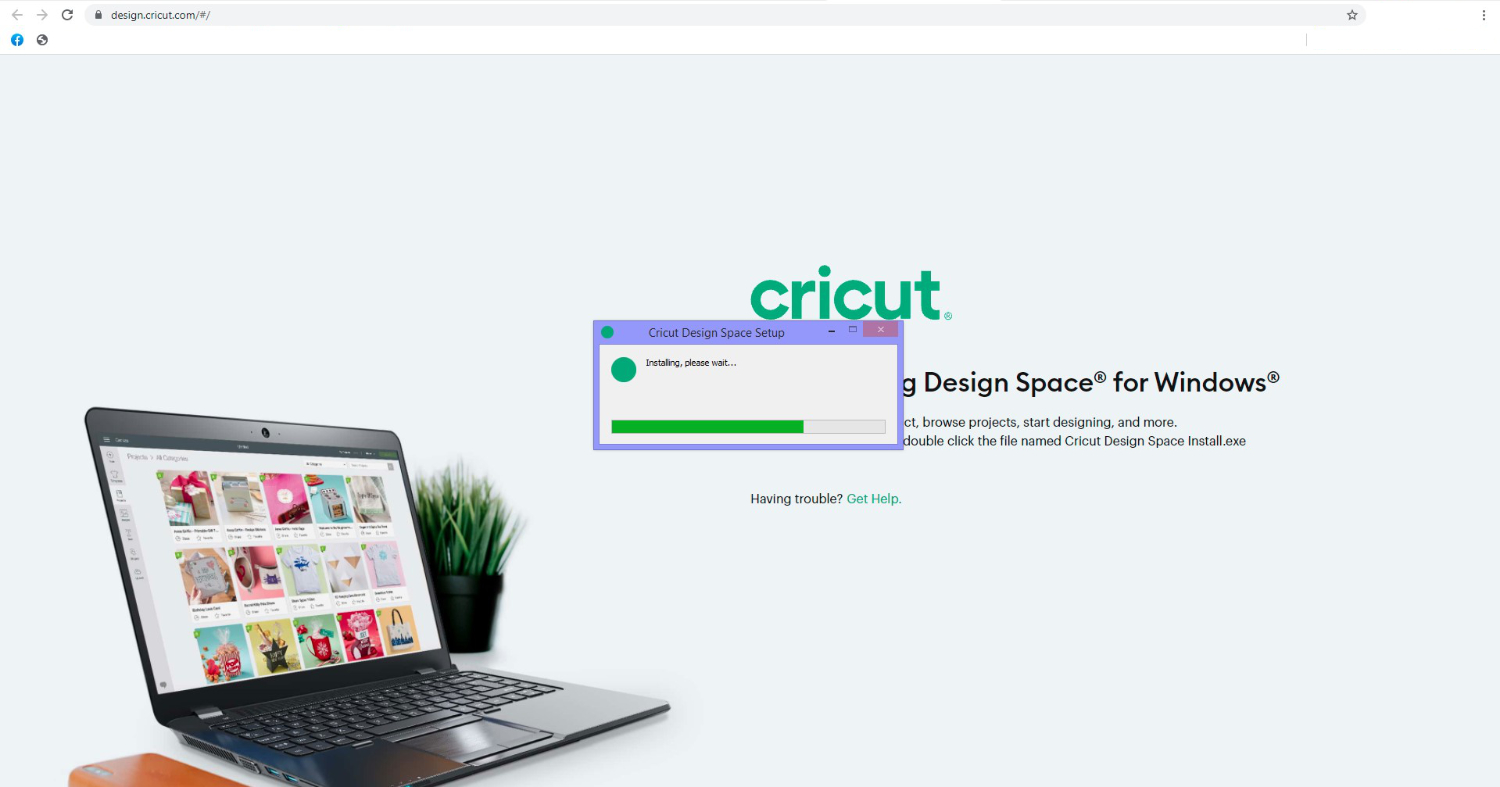
Download Cricut Design Space on Your Device

Downloading the Design Space is crucial for the Cricut Maker 3 setup. But you do not have to worry as it is easy. You can simply do it if you follow the instructions well. By this time, I am sure you have setup your machine and connected your phone/computer to the internet. Now, you should open any browser and go to the official website of Cricut. You can download the app from there.

If you are already a user of Cricut and have made an account, you just need to sign into the app. In case you are new, you will need to create a new account. This is also an easy task, and you can do it by following these easy steps:

  1. First, go to the browser on your device and open design.cricut.com.
  2. Next, click Download so that the app can be downloaded.
  3. In the case of a computer, go to the Downloads folder.
  4. Now, click twice on the file to initiate installation.
  5. In the end, open the installed file and sign in.
  6. In case you are a new user, go for the option of Sign Up for creating an account.

Conclusion

In short, the Cricut Maker 3 setup is not a difficult task. You just have to do a few things, and you are ready for your crafting. In the beginning, you open the box and check for all the equipment. Then, you begin to setup the Cricut machine, which you can do by following the steps written up there. In the end, you download the Design Space application and sign in to your Cricut ID. Once done, you are ready to start your crafting journey.

Source URL: – Cricut Maker 3 Setup

How to Connect Cricut Machine to a Computer and Mobile?

Hey, are you looking for a simple guide that can teach you how to connect Cricut machine? If yes, then you are in the right place! In this post, I will talk about the steps to pair the Cricut machine on a desktop and mobile.

Do you know why we need to connect a Cricut machine to a compatible device? Look, this is no different than the setup because the connection is part of the Cricut machine setup. A Cricut setup is required to get started with this machine. To design or modify the design, you will need the Cricut Design Space app. But here, I will not talk about software; I will teach you the steps to connect.

One by one, I will start with a Windows computer and then end with an iOS device. So, are you ready to get the answer to your question: How do I connect my Cricut machine to my computer? If so, then let’s get into it without further ado!

Connect Cricut Machine to Your Computer

When I use my Cricut on my computer, it offers me more features than the mobile version. But it still depends on what crafters like you want to use. What is most suitable? I don’t know whether you want to use Cricut on a Windows or Mac computer, so I will explain the steps to connect below for both desktops.

For Windows

  1. Find a flat surface to place your Cricut Explore Air 2.
  2. Be careful about a distance of 10 – 15 between the PC and your machine.
  3. After that, you should move to the Windows taskbar.
  4. There, you need to click the Windows icon. Then, hit the gear icon to launch Settings
  1. In the following step, click on Devices.
  1. Here, you should confirm whether your Bluetooth is ON.
  2. After your Bluetooth is turned on, tap Add Bluetooth or other device.
  1. Afterward, click the Bluetooth option.
  2. Let your Windows computer find your machine’s model name.
  3. As you see it on your screen, select the Cricut model.
  4. After selecting it, you can easily pair it with your computer.
  5. Finally, you have learned how to connect Cricut machine to your PC.

For Mac OS

  1. Once the Mac is turned on, place the computer and machine together to connect it via Bluetooth.
  2. To connect, go to the Apple menu.
  3. Afterward, choose the System Preferences.
  1. Here, look for a Bluetooth option on your Mac computer.
  1. Once you have found it, turn on the Bluetooth.
  2. Following this, select your Cricut model from the available list.
  3. Now, you have connected your Cricut to Mac computers.

Connect Cricut Machine to a Mobile Device

Depending on the type of project, I change my devices. When I have bigger projects, I prefer a desktop, which is perfect for creating a design or editing. Also, controlling Cricut via a computer is more convenient than using a mobile device. But you can’t neglect the benefits of using a phone, too. It is easy to connect, and the phone we always keep with us makes it easier to use Cricut.

For Android

  1. Go to your Android phone and then navigate to the toggle bar by swiping it below from the top screen. (See the screenshot below).
  1. After that, you will need to click the gear icon to open your Settings.
  2. Once you are in phone Settings, move to the Bluetooth option.
  3. In the following step, turn on Bluetooth.
  1. You need to wait and hold for a while to see whether your device finds your nearby Cricut.
  2. Once it detects the Cricut, click on it to pair.
  3. Now, it is done. It might be clear to you how to connect Cricut machine.

For iOS

  1. On your iOS (iPhone or iPad) device, go to the Settings app.
  1. Then, turn on the Bluetooth by selecting the toggle button.
  1. Now, wait and check your iPhone.
  2. See if your device detects your Cricut machine.
  3. Once detected, click on it to pair.
  1. Finally, your device is connected to Cricut. Enjoy!

FAQs

Question 1: Why do I need to connect my Cricut to my device?

Answer: The Cricut machine should only be connected to compatible devices. It is necessary as it helps the crafters to set their machines up. By setting up the machine, you can easily create, edit, and modify your design on Cricut Design Space. During setup, Cricut will also update its firmware.

Question 2: Which device is compatible to connect Cricut?

Answer: According to Cricut, you can connect your Cricut to a computer and mobile device. In other words, if you are connected to your desktop, you can easily connect it to a Mac or Windows computer. Other than that, it doesn’t support Chromebooks or Unix/Linux. Speaking of mobile devices, Android and iOS devices are compatible with Cricut.

Question 3: Do I need a computer to connect Cricut machine?

Answer: Yes, but it is not compulsory to have a computer only. You can connect your Cricut to a mobile device, whether Android or iOS. Cricut connects easily with every device except for Chromebook and Unix/Linux. Besides, you will need to ensure that your computer or smartphone is compatible with the hardware and software. To learn about the system requirements, you will need to visit Cricut’s official website.

Source URL: – Connect Cricut Machine
Cricut.com/setup
Cricut Design Space Login
cricut explore air 2 software
How to setup cricut maker

Cricut Design Space Download for iPad: Easy Instructions

The last time I found related details about the Cricut Design Space download for iPad was a week ago. Since school, I have been a member of the arts and crafts community known for my amazing talent. As a senior, I focus on getting into my favorite art university.

Last month, my professor gave me a Cricut machine as a graduation gift and advised me to use it properly while creating DIY projects. One essential thing I learned was the importance of the Cricut app. This software helps me express my feelings and create unique projects with a Cricut machine.

In addition, I collected primary information that helped me recognize this Cricut Design app. This booklet will share the system requirements and instructions for downloading the Cricut software.

Which Mobile Devices Are Compatible With Cricut Design Space?

All of you will agree that Apple Inc. keeps launching new models of iOS devices for their customers in the market. Before making the final call to use this software, you must ensure your model is compatible with this Cricut app. The iPhone models you can run in the software arethe iPhone 12, 11, 13, and 14 series. On the other hand, the iPad models compatible with Cricut Design Space are the iPad mini, 10th, 05th, and 04th generation.

Don’t waste more time if your iOS device name is on the list. Get started by meeting the system requirements. We’ve shared the requirements and the method for installing the software on your iOS device.

System Requirements to Cricut Design Space Download for iPad

Before drawing up new projects, you must be aware of the requirements for the Cricut app download for iPad. If your device can’t meet them, you won’t be able to use it. Take a moment and start studying the details shared about the system requirements:

  • Operating System: iOS 15 or current version.
  • Broadband Connection: For uploading documents: 1-2 Mbps & for downloading documents: 2-3Mbps.
  • Offline Feature: The app will work smoothly without being connected to the internet, and the memory will entirely depend on usage.

On the other hand, you are well-informed that software system requirements change over time. Keep yourself updated to avoid issues while using the Cricut app on your iPhone or iPad.

Cricut Design Space Download for iPad

Equally important, you can use Design Space as an app on your iPad or iPhone rather than using it through the search engine. To download it on your mobile device, you must go through the following set of instructions:

  1. Take the initiative to download the app by switching on your mobile device.
  2. Now, unlock it and look for the App Store on your phone’s home screen.
  1. After finding it, open it and start searching for Cricut Design Space.
  2. Also, the Cricut software appears before you, with Cricut written inside the white box.
  3. To download the app, press the Get box and confirm the download by entering your iTunes password.
  1. On the contrary, you can also allow the download by double-clicking the power button.
  2. Now, you must wait until your Cricut Design Space download for iPad is in progress.
  3. After the download is concluded, close the App Store and open the Cricut app.
  4. Following this, either choose Machine Setup or Sign In to proceed toward the next step of the process.
  1. Lastly, you can open the Cricut Design app and create your imaginary ideas on the canvas.

In conclusion, the Cricut software is an essential tool for all DIYers. With this app, they will be able to share their DIY ideas and transfer designs to the machine. Before getting the app, they must ensure their iOS models satisfy the system requirements and download properly on the phone.

Frequently Asked Questions

Question: Does iPad Work With Cricut?

Answer: You can surely use an iPad with a Cricut machine to create new DIY projects. Before beginning any new craft, you must setup, connect, and pair your iPad with any Cricut model. Also, ensure that your iPad and machine have built-in Bluetooth connectivity for smooth wireless connection.

Question: Why Am I Unable to Connect My Cricut App to iOS?

Answer: The common reasons why you are facing difficulty in connecting your Cricut Design app to iOS models are as follows:

  • Slow internet connectivity
  • Your Design Space app server must be slow
  • Outdated version of the Cricut software
  • Incompatible web browser
  • Device compatibility issues

Question: What Is Cricut Design Space Monthly Fee?

Answer: Cricut Design Space is free to crafters. However, to enjoy certain benefits, they must have a Cricut Access subscription plan. You can choose a monthly or yearly plan. The monthly amount to access this plan is $9.99 or $95.88 yearly until they are uncancelled.

Visit – Cricut Design Space Download for iPad
Cricut Design Space Login
Cricut Explore air 2 software
How to Setup Cricut maker
Install Cricut Design Space app

How to Download Cricut Design Space: A Comprehensive Guide

If you expect a project from your Cricut machine, no matter what model you have, chances are you’ve heard about the importance of Cricut Design Space. This app is essential for getting started with Cricut as it offers free images, fonts, and many functions to make designs and control the Cricut machine.

If you are looking fora guide on how to download Cricut Design Spaceyou’re in the right place. In this blog, I will provide in-depth info on downloading and installing the Cricut software for Mac, iOS, Windows, and Android. I have ensured that everything is taken care of, so you will not face any issues during the download process. Let’s begin without further delay.

System Requirements for Downloading Cricut Software

Before downloading Design Space, ensure that your system meets the requirements below. Common requirements for all devices include a USB port, Bluetooth connection, and an internet speed of 1-2 Mbps.

MacWindowsiOSAndroid
RAM: 4GBWindows: 10 or lateriOS 15 or laterAndroid 10 or higher
CPU: 1.83 GHzRAM: 4GBiPhoneMobile  & tablet
2 GB free disk spaceCPU: Intel Dual-CoreiPadIt does not work with Chromebooks
Display: 1024px X 768px screen2GB free disk spaceAlso offline available 
macOS 11 or later1024px X 768px  

How to Download Cricut Design Space on Your Computer?

Perform the steps in the section below to download and install the Cricut software on your computer.

For Mac

Follow the instructions below to install the Cricut software on your device.

  1. Open your browser and navigate to cricut.com/setup. The site will detect your device once you visit it.
  2. Once on the page, agree to Cricut’s terms and conditions to enable the Download button.
  3. Click the Download button. You’ll be prompted to choose a location to save the file.
Download Cricut design Space
Install Cricut App
  1. Once downloaded, go to the file and double-click on the .dmg file. Double-click on the software. A Mac window may appear asking you to cancel or open the program. Select Open to proceed.
Downloading And Installing Cricut App for windows & Mac
  1. Finally, sign in to your account using your details or create a new account.

For Windows

The following instructions are for installing the Cricut software on a compatible Windows computer.

  1. To download Cricut Design Space on a Windows system, open an internet browser and visit cricut.com/setup.
  2. Once on the Cricut page, agree to the Cricut Terms of Use and click on the Download button.
Cricut Download On Windows
  1. Select the downloaded file from your browser or Downloads folder once the download is complete.
Download App Folder
  1. In some cases, a pop-up window may appear asking for your trust in the app. Select “Yes” to proceed.
  2. Following that, the Cricut setup window will display the installation progress and complete the process.
Installing Continue Download it 100 percent
  1. Once installed, launch the software and sign in to begin using it.

How to Download Cricut Design Space on Your Mobile?

If you want to know how to download Cricut Design Space on your mobile phone, then follow these instructions.

For iOS

The Design Space is an app for iOS devices. Here is how to install it:

  1. To get started, open the App Store icon on your iOS device and search for Design Space.
  2. After that, select the Cricut app, tap on the “Get” button, and confirm the download with your iTunes password.
  3. Now, wait for the Cricut app to finish downloading. Once it starts, sign in or open Machine Setup.

For Android

If you are an Android user, here’s how to download Cricut Design Space to your device:

  1. In the beginning, locate and open the Google Play Store on your device.
  2. Use the search bar to look for “Cricut Design Space“. Among the options listed, choose the one with the white square featuring the word “Cricut.”
  3. After that, you have to hit the Install button to finish the installation procedure.
  1. Once the Cricut app is installed, it will appear alongside your other apps.
  2. Finally, sign in to start using it.

Final Words

Crafting with the Cricut is quite easy; all you have to do is complete the machine setup and use Design Space. But before anything else, it’s important to know how to download Cricut Design Space, as I explained above in this guide. Now, if you have installed the software, you need to familiarize yourself with the functions of the Cricut machine.

Frequently Asked Questions

Why is my Cricut Design Space not loading?

Here are some common causes and solutions if your Cricut application isn’t loading.

  • A poor internet connection can cause a loading issue, so check it and ensure it meets the requirements.
  • Another possibility is that your device may not meet the minimum system requirements for the Cricut Design app.
  • A third common reason is that you have a third-party antivirus program that is preventing Design Space from loading.

How do I log in to Cricut Design Space?

Once you have installed the Cricut app, it is time to log in to access its functions. Here’s how:

  1. Launch the Cricut software and create a Cricut account.
  2. Afterward, relaunch the app, click Sign In, and enter your Cricut ID Password.
  3. Once this is done, you will be directed to the home page, where you can access its functions.

What is Cricut Access in Design Space?

Cricut Design Space is free and essential software for Cricut crafters, while Cricut Access is a paid subscription that unlocks additional features. With Cricut Access, you’ll get discounts on Cricut items and gain access to thousands of pre-made projects, images, and fonts. This subscription is perfect for those who are looking to enhance their crafting with less effort.

Source URL: – How to download Cricut Design Space

How to Make Cricut Thank You Cards: Easy and Simple Steps

Welcome back, guys! Look what I made today: Personalized Cricut Thank You cards. I am creating this craft to appreciate my grandfather, as he has done many things for my family. Adding a personal touch to the card will make it look like it was made out of love and respect. Beyond the shadow of a doubt, greeting someone verbally is nice, but expressing it with words directly touches the heart.

I am a little of an introverted person and don’t share my feelings with anyone easily, but this time, I have made up my mind and will value his sacrifice to satisfy our unnecessary demands. After making the final decision, it’s clear that I will need some crafting items and a complete process to complete the craft.

Stay with this blog until the end and collect full-fledged info about making this custom project with the cut-die machine.

Step 1: Draw a Thank You Card on Cricut Design Space

Commence the method of designing this do-it-yourself project by going to the Cricut sign-in page and creating your account. Now, open the app and press the New Project on the left side of the page. After a few seconds, you will connect to the canvas, press Upload and your image from the Recent Uploads, and tick Add to Canvas.

Before taking a step towards cutting the card:

  1. Decrease your card size and ensure that the details are visible.
  2. Select the card and click Ungroup to edit each layer of this DIY project.
  3. Choose Thanks You Rock, press the Weld button, and repeat the same with the white layers inside the cassette.

In the middle of the card, you will see a straight dotted line; that’s where you will score to make the card easily foldable. After observing that, select the line given under the Layers area, tick Operation, and choose Score from the list. Then, select both layers to connect your Cricut Thank You cards with the score line and press the Attach option.

At this time, write the message of your wish, change its color, font, and size, and add a heart at the end. Next, return to operation dropbox, tick the Pen from the list, and press the Attach option. After selecting the option, press the Make It and share the card with the Cricut machine.

Step 2: Choose Your Material and Start Cutting 

After finishing your design, choose On Mat, followed by the Continue option, and start selecting material for your craft. In order to design this project properly, your machine will perform four different kinds of cuts. For this project, choose Medium Cardstock (80lb) and load the tools and materials depending on the cut you will do.

Remove the plastic sheet from your Cricut material and place it on the cutting mat using the brayer tool to remove the bubbles and spaces. Please turn on your craft plotter and insert the mat inside it. After finishing the cutting process, bend your mat and release the design. Follow the same steps with the rest of the mats until you get all the pieces of your Cricut Thank You cards.

Step 3: Stick All the Pieces Together

Give a pat on your shoulder as you have smoothly completed the most crucial steps of designing this custom-made project. It’s time to connect all the pieces and make this personalized project from a craft plotter. Start sticking the pieces by taking the Thank You Rock word.

Next, stick the square inside your card and the cassette design. If you need clarification, go to Design Space and check the sequence. Now, give rest to your Cricut Thank You cards and let all the pieces stick together. There you go! Keep your head up and shine like a star in the community after sharing it.

Conclusion

There are many other ways to give perfect form to this custom-made project elegantly. But this is my favorite as it gets complete using fewer crafting supplies and is easily understandable. Apart from that, any fresher or expert can make it out of any Cricut cutting machine within a few minutes. Also, you can start your own business by making and selling Cricut Thank You cards in your society.

Frequently Asked Questions

Question: How Do I Make a Card With Cricut Joy?

Answer: If you have Cricut Joy and want to design any card, then go through the steps given below:

  1. First, select the Thank You created from the Design Space application.
  2. Second, peel off the protective sheet of the card and stick its front part on it.
  3. Third, load the mat into the Joy machine and let the cutting process begin.
  4. At last, remove the extra material with the scraper tool, and your card is ready.

Question: On What Occasion Can I Create Cards With My Cricut?

Answer: Cricut is such a fantastic craft plotter so you can make different cards from it. The ideas include:

  1. Valentine’s Day
  2. Birthday
  3. Graduation ceremony
  4. Mother & Father’s Day
  5. Halloween party
  6. Thanksgiving party
  7. Christmas

Question: Is It Compulsory to Make a Card in Cricut Design Space?

Answer: Since the Cricut cutting machine is compatible with the Design Space app, all DIYers must create card designs. You will find multiple images, fonts, templates, and ready-to-make projects. Also, you will enjoy the Cricut Access plan, where you will get to use an ever-growing library offering multiple images, fonts, and customized projects.

Visit – Cricut Thank You Cards
Cricut.com/setup
Cricut Design Space Login
cricut explore air 2 software
How to setup cricut maker

How to Upload Fonts to Cricut Design Space: Stepwise Guide

What’s up, crafters? I am sure you are thinking of something creative, am I right? Well, making crafts is nothing new to you, but there are multiple ways to upgrade yourself. Are you thinking about uploading a new font to your Design Space? Sure, you can do that and create your own font. The best part is that this process is going to be easy for you. So, follow me to learn how to upload fonts to Cricut software.

You don’t need to spend hours finding the right font in Cricut Design Space — rather, you can find it somewhere else, which is what I’m going to tell you about. Adding fonts to the Cricut app is an extremely easy process. So, let’s get started with that.

How to Find a Perfect Font to Upload?

Options for perfect fonts are never-ending. There are many places to find Cricut fonts, and some of my favorite ones are fonts.google.com and Creative Fabrica. On these websites, you will surely find some cool fonts. Apart from them, there are also some sources like

Creative Market and dafont.com are where you can get some high-quality fonts completely free.

Isn’t it great? However, not all fonts will be free on them, and to get some specific fonts, you may need to pay some money. So, if your purpose is to sell items you make, you can go for the paid fonts that often have a commercial use license.

How to Download a New Font to Cricut Design Space?

If you have finally selected your perfect font and you are all set to download it, go ahead with my simplest steps here.

  1. Download your font from a site and check where it gets downloaded to your folder.
  2. Then, unzip your font folder and then double-click on that file. Usually, you will get the font files in .ttf or .otf type. But, I will .otf file.
  3. Now, continue with all the on-screen prompts on your desktop to get the font file.
  4. When your font is installed, launch your the Cricut software.
  5. After that, you need to create a new project.
  6. Next, add the new text layer and choose the text box to add the text to Design Space.

That’s how you will add the font easily to your Design Space canvas. When you download fonts, your guesswork will become zero as you will know which font to use.

How to Upload Fonts to Cricut on a Windows PC?

Are you a Windows user? Perfect. Most of my work is PC-based, so I can tell you well how to upload fonts correctly to your Design Space. Look at the steps below.

  1. In the first step, download your font file, move it to your Downloads folder, and get the downloaded file.
  2. Then, right-click on the file if it’s compressed and choose Extract to get the files.
  3. Now, your font will be added to your PC and the software.

You have understood the download procedure. You can move it to the Cricut Design app canvas by using the steps I have shared at the start.

How to Upload Fonts to Cricut on Your Mac Computer?

Well, if you are a Mac user, I have different steps for you. I don’t use Mac often, but for all of you, I tried adding a font to my friend’s Macbook. So, the steps are easy; let’s check them below.

  1. Similarly, download a font file to your Mac.
  2. After that, unzip your file if it is compressed in the .zip format.
  3. Double-click on the font in your Finder window and let the font install.

You will get your fonts in just three simple steps. Now, you can do anything with your fonts and make great projects.

How to Upload Fonts to Cricut on Smartphones (Android/iPhone)?

If you prefer a mobile phone to use Cricut Design Space, don’t worry. You can also get the latest fonts on your device. Follow my steps below.

For Android

  1. First of all, install an app to manage fonts. I prefer iFont.
  2. Then, download your font and navigate to it under the Downloads folder.
  3. Now, if your file is compressed into .zip format, get the file.
  4. Launch your iFont app and then head to the My Font option.
  5. Next, open that option to see the preview of your font and then install it on your device.
  6. At last, hit the Set option to finish the installation.

These are the final steps for adding fonts to Cricut on an Android smartphone. Now, create your favorite designs with your unique fonts.

For iPhone

iPhone users don’t need to worry; I have a separate section for them. You will also need to install an app to manage fonts. iFont is a perfect app for you, too. Let’s look at the steps.

  1. First of all, install the iFont app to manage your fonts.
  2. Then, download your font and unzip it from the Downloads folder.
  3. Now, launch your iFont and choose the Font Finder.
  4. After that, choose the Open Files window and search for your font file to install.
  5. Next, choose the Installer tab and hit the Install button with the font to allow the installation.
  6. Then, hit the Continue button and then click the Allow option.
  7. Next, launch your Settings app and close the iFont app.
  8. Now, click on the Profile Downloaded option.
  9. Finally, you will get the option to Install your favorite font.

Finally, the font is installed on our iPhone, and you are all set to use it. Now, you have learned the uploading process on almost all the devices.

Conclusion

If you are thinking about how to upload fonts to Cricut Design Space, this blog can be helpful to you. Fonts are so creative and can add spark to your lovely projects. Also, if you are someone who likes to sell your creative items, the addition of a great font will level up your projects and will make you grow as a crafter. I have shared all my favorite sources with you, like dafont.com and Creative Fabrica; if you have better sources than mine, go for it.

Source URL: – How to Upload Fonts on Cricut Design Space

Visit – Cricut.com/setup

Cricut Design Space Login

Setup Cricut Machine

Cricut Machine Stepwise Guide

Install Cricut Design Space app

How to Cut Heat Transfer Vinyl on Cricut Maker: Easy Guide

Hey crafters! Hope you are doing well! Today, I have come up with an interesting topic on how to cut heat transfer vinyl on Cricut Maker. If you are going to make your first project or just want some clarity on the use of HTV, you have come to the right blog!

A few years ago, when I was new to crafting, I was unable to figure out between vinyl and infusible ink sheets. Also, I used to think that I could use all types of materials on any project. But, I learned that the right material can really give an outstanding result. I learned everything about materials while making different types of projects. When I created the project myself, I could really see the difference, and I could decide which one to use in my project.

Besides, I will show you how to cut iron-on using Cricut Maker with step-by-step instructions. To learn more about this, let’s delve into this blog.

Step 1: Choose a Cricut Machine in the Design Space

As you already know, this blog is about how to cut heat transfer vinyl on Cricut Maker, so I am going to choose the Cricut Maker in the Design Space app. For this tutorial, the Cricut software is a must. Without this software, we can’t make a single cut on any materials.

To select this machine in your Cricut Design app, follow the instructions given below:

  1. First, open the Design Space app.
  2. Then, you need to go to Canvas. 
  3. Navigate to the upper right corner and click onthe Dropdown arrow.
  4. Next, select the machine you want to use.
  5. For example, here I am choosing Cricut Maker.

Step 2: Add the Design

There are many options available to add the design. You can either create one or upload an SVG file. You can easily get this file from Cricut Access. Once you are ready with your design, you can resize it according to your project.

Once the design is completely ready, you need to click on the Make It button located in the upper right-hand corner.

Step 3: Preparation Before the Cutting Process 

Now, we have to do some preparation; then, I will teach you how to cut heat transfer vinyl on Cricut Maker. So far, you might have created your design, and now it is ready to be cut. But there is one thing you should not forget, which is Mirroring the design. Yes, mirroring a HTV design is a must.

Once you have mirrored the image, you need to hit the Continue button.

After that, you will need to set the material. As you proceed ahead, you will see a list of custom materials. Select the materials you are going to use. For example, I am choosing iron-on vinyl, i.e., heat transfer vinyl.

After that, you have to place the material on the mat. While placing it on the mat, make sure the shiny side is facing down on the mat.

Finally, you need to load the mat by pressing the flashing arrow button. Once done, you are ready to learn how to cut heat transfer vinyl on Cricut Maker in the next section.

Step 4: Cut the Cricut Heat Transfer Vinyl

Here, you need to ensure that you have installed the fine-point blade in your Maker cutting machine. Once the tool is inserted, you can press the flashing C button on your Maker machine to begin cutting the heat transfer vinyl.

So, that’s how easy it is to cut the heat transfer vinyl on Cricut. After cutting it, you can easily place it on your blank shirt. But, you will need a Heat Press, such as a Cricut EasyPress. This tool will help you preheat the project and transfer the vinyl onto the project.

FAQs

Question 1: Can I cut the heat transfer vinyl using my hand?

Answer: Yes, you can cut the heat transfer vinyl with your hand, and you don’t need any type of cutting machine such as Cricut Maker, Explore, or Joy series. All you need to use is a pair of scissors or a craft knife. However, cutting it using your hands is only useful when your designs are not that intricate. For intricate designs, I would suggest you use a digital cutting machine.

Question 2: Should I mirror heat transfer vinyl?

Answer: Yes, you should always mirror your heat transfer vinyl whenever you are going to cut it on Cricut. In addition, you will need to place the materials facing the downside on the mat and cut it from the back with your design. After that, press it with the transfer sheet upside down on your blank shirt. As a result, it will adhere to your shirt or other blank properly.

Question 3: What is the advantage of using heat transfer vinyl?

Answer: There are numerous advantages of using these materials, as they provide a high degree of stretch and rebound. Due to this, it is suitable for apparel and other items that are flexible, such as clothes or sports jerseys. Also, there are multiple color options available so that you can customize your clothes or items accordingly.

Final Words

You might have cleared your concept of how to cut heat transfer vinyl on Cricut Maker. In this blog, I have included a total of 4 steps to explain the process of cutting iron-on vinyl, which is also known as heat transfer vinyl. Also, the HTV provides its own benefits and is very suitable for fabrics or sports jerseys. In addition, the Cricut Maker can easily cut the iron-on vinyl using the fine-point blade. So, follow easy steps and learn to cut heat transfer vinyl for Cricut.

Visit – How to cut heat transfer vinyl on Cricut Maker
Cricut.com/setup

Cricut Design Space Login
Cricut heat transfer vinyl
heat transfer vinyl for Cricut

How to Clean Cricut Mat: Top 4 Effective Methods

Are you searching for a suitable answer on how to clean Cricut mat? Then, this guide is going to be the best choice for you. Becoming a crafter isn’t a piece of cake, as you need to take care of every accessory while making DIY projects. One of the essential supplies and tools that plays a vital role during the crafting process is the Cricut mat.

I remember when I bought the cutting mat, it was sticky, but as time passed, the stickiness of the mat started to reduce. After utilizing my time in research, I was successful and found relevant methods of cleaning cutting mats. Carry on with the blog, and you will find the easiest way to clean the mat and make it reusable.

How to Clean Cricut Mat Using Dish Soap?

As a DIYer, you must be aware that there are various types of Cricut cutting mats available in the market right now. Indeed, the methods to clean them also differ from each other. One of the methods to clean a Cricut mat is to use dish soap. Have a look at the below steps and learn about the steps that need to be taken while using this method:

  1. Start the process by unboxing your scraper tool and start removing unwanted debris from the mat.
  1. After cleaning the mat with the scraper tool, place your cutting mat on a waterproof flat surface.
  1. Now, remove the protective sheet, move it to the sink, and clean the remaining dust with warm water.
  1. Next, take a smooth sponge with a liquid dish soap and smoothly scrub the mat surface.
  1. Following this, if you notice any spots, then use extra force on those areas and remove them.
  2. Afterward, rinse off the soap by scrubbing it in a circular motion by cleaning it with warm water.
  1. Lastly, leave the mat and let it dry before using it for cutting purposes.

Another method that you can refer to for cleaning the Cricut mat is baby wipes. It is an alternative to cleaning mats with dish soap.

How to Clean Cricut Mat with Baby Wipes?

Before considering this method, ensure that you are using alcohol-free baby wipes. Those wipes will not remove the adhesive layer, making the cutting mat longer as compared to actual time. Have a look at the following steps and get to learn about the steps of cleaning the mat with this method:

  1.  First, you need to buy alcohol-free baby wipes from your nearby general store.
  1. Second, take out a single sheet of wipe from the pack and move it across the mat in a circular motion.
  2. Third, repeat the process of cleaning the mat with a swipe at least two or three times.
  3. Now, put gentle pressure and be careful not to scratch off the adhesive from the mat.
  4. Finally, put aside your mat and let it dry before using it to make the customized design.

How to Clean Cricut Mat with Awesome Spray?

In addition to cleaning the Cricut mat, you can choose awesome spray as one of the cleaning methods. You can easily find this spray near your general store or an online shopping website as well. Go through the steps and complete the Cricut mat cleaning process:

  1. Initiate the process by purchasing the product from the store and spraying it across the mat.
  2. Next, let the mat absorb for 5-10 minutes, and use a sponge or scraper tool to remove extra dirt from the cutting mat.
  1. Now, hold on to your cutting mat, clean it with lukewarm water, and let it dry in natural sunlight.

How to Clean Cricut Pink Fabric grip Mat?

Equally important, all the methods mentioned earlier are considered to clean Cricut cutting mats except the pink Fabric grip mat. As compared to other models, this mat has a fragile adhesive. If you own this Cricut cutting mat, you must choose tweezers and remove the big pieces of debris.

Each cleaning process of how to clean Cricut mat is simple and quick as well. All of these methods are great ways to increase the life of the cutting mat. Finally, your mat’s sticky surface will come back to life and be all set to be used again for crafting.

Frequently Asked Questions

Question: How Often Should I Clean My Cricut Mat?

Answer: If you regularly use Cricut mats for designing projects, then you need to use the mats more often after every craft. It’s better to clean the mat once a week and clean it after every 2-4 cuts completely, depending upon the material type. You are advised to clean the mat whenever you notice any kind of dust or unwanted material after completing the design.

Question: How Can I Make My Cricut Mat Sticky Again?

Answer: To increase the lifeline of the mat, you can also restock your cutting mat. The process of restocking the mat is very easy and simple. Have a look at the steps below:

  1. Clean the mat with baby wipes, awesome spray and remove the dirt or debris.
  2. Now, tape off the mat edges and apply a new strong adhesive with a new brush.
  3. Next, leave it for 10-15 minutes, keeping the adhesive dry and making the adhesive strong.

Question: How Long Do Cricut Cutting Mats Last?

Answer: Normally, the Cricut cutting mat lasts up to 50 cuts before it starts losing its stickiness. Undoubtedly, with the correct cleaning tips and methods, the user can make their mat last longer. You can use various methods to clean the mat, such as baby wipes, awesome spray, and many more.

Visit – How to clean Cricut mat
Cricut.com/setup
Cricut Design Space Login
how to clean Cricut cutting mat
how to setup cricut maker

7 Christmas Projects With Cricut Maker to Celebrate Holidays

Are you excited to create your Christmas projects with Cricut Maker? Every year, when Christmas arrives, my family and I are also very excited as we all gather together to make custom projects to spread the Christmas spirit. Our house is one of the centers of attraction because I am an expert DIYer, and last year, I decorated my house incredibly. Therefore, I have a lot of ideas for Cricut Maker Christmas projects that are easy to create on Cricut Maker.

Plus, Cricut Maker is a craft cutting machine that can cut over 300+ materials, such as fabric felt, paper, wood, acrylic, and more. Its robust capabilities allow users to use it for all types of projects. So, let’s explore 7 unique Cricut projects and make them using your Cricut Maker or Maker 3. Are you ready? Let’s get started.

1.  Customized Candle

Let this candle spread its light to every corner of your home, spreading the goodness on the Christmas holiday. Coming to the creativity of this candle, I used glitter vinyl to write this catchy phrase, “Shine Bright,” on the candle glass. The main purpose of making this candle was for my mother-in-law. She loves to keep candles in her room, so I made this open for her. But, believe me, customizing this candle using Cricut Maker was SUPER easy.

2.  Cushion

This Christmas, you should also decorate your cushion for your sofa. Of course, many people will be gathering here, so don’t leave it as simple as it was earlier. In order to make it truly eye-catching, this leather-made Christmas tree is on the fabrics. This black and brown Christmas tree looks amazing on the white cushion cover. Also, Cricut Maker is the perfect tool and works well with fabrics or leather. So, cut any design that you want.

3.  Wood Sign

How about this Christmas sign? Simple and elegant Christmas projects are my all-time favorite. In order to make Christmas projects with Cricut Maker, such as this one, you will need some pieces of wood in a star shape and then customize it accordingly using adhesive vinyl. In this project, I used glitter vinyl that gives a positive vibe on such a special day.

4.  Window Decals

I was so excited when I made this last year on Christmas. This decor is one of my favorites, and I am going to make it again this year. It may seem complicated, but it is simple to do using your Maker. To make this window decor, you need to use non-adhesive materials which are easily removable. This non-adhesive material sticks perfectly on windows, glassware, mirrors, and vases. This is a great idea to implement in your children’s room because they are the ones who eagerly wait and count down the days for Christmas arrivals.

5.  Leather Monogram Charm

If you’d ask me for the perfect accessory for a Christmas stocking, then It’d be these leather monogram charms. You can add the same monogram to your keychain. Use the knife blade to cut the leather using your Cricut Maker, and you will be good to go. Such Christmas projects with Cricut Maker are always going to add charm to your Christmas holiday.

6.  Personalized Ornaments

Try the personalized ornament with the special touch of your Cricut Maker. Such an ornament is one of the best Cricut Maker Christmas projects for your holiday. Christmas ornaments are something I make every year because, without them, my Christmas tree decoration is incomplete. Choose from a wide range of materials with different colors and make it look stunning!   

7.  Dining Table Centerpiece

For my holiday decorations, I chose this simple but elegant theme centerpiece idea for my dining table. With this idea, you can also add a festive touch to your dining table. In order to make this captivating 3D Christmas tree centerpiece, I used cardstock materials in different colors and cut it using a Cricut Maker. Due to its intricately cut designs, it looks charming and eye-catching. In addition to your holiday decor, bring magic to your Christmas table.

Final Thoughts

In a nutshell, I added the 7 most beautiful Christmas projects with Cricut Maker that aim to bring joy to your holiday celebrations. Whether it is an ornament or Christmas table centerpiece, they all serve as a captivating addition to your Christmas decorations. In addition, these Christmas projects will help you infuse your festive gatherings with a magical and personalized charm.

FAQs

Question 1: What Cricut machine should I use for making greeting cards?

Answer: Anyone looking for the best Cricut machine to make a greeting card then they can go with a Cricut Explore series. The main reason to select this Explore series is because it easily fits into the budget. Plus, it is the best option if you want simplicity and value. Moreover, it can easily cut popular materials such as vinyl for stickers, iron-on for shirts, and paper for greeting cards.

Question 2: How can I make Christmas cards with Cricut Maker?

Answer: In order to make Christmas cards, you will need a Cricut cutting machine, cardstock in different elegant colors, Design Space in your computer, and other Cricut accessories. Afterward, you will need an SVG file or create your own Christmas designs for your cards. Then, load the compatible materials onto the cutting mat and hit the Make it button to start cutting the design. If you are using any vinyl, then you can also cut it and transfer it onto your cardstock materials.

Question 3: How to make Christmas gift tags with Cricut?

Answer: For Christmas gift tags, you will need any Cricut cutting machine along with materials such as cardstock. You can also consider glitter cardstock to give it a better look. After that, start creating a design on the Cricut app and select the Make It button to send the cutting command to your Cricut cutting machine. It will cut the design on your loaded materials.

Question 4: What are some Christmas projects with Cricut Maker?

There is nothing that you can’t do with your Cricut Maker. This model is the most versatile machine in Cricut’s lineup, and hence, you make almost everything. Here are some best Christmas projects that you can make using your Cricut Maker machine:

  • Newborn footprint
  • Hot chocolate reindeer
  • Dog bone ornaments
  • Paper holly wreath
  • Paper scroll sign
  • Snowman favor tins
  • Tea towels
  • Pillow covers
  • Greeting cards
  • Coffee mugs, and more.

Source URL: – Christmas projects with Cricut Maker

Visit – Cricut Maker Christmas projects

Cricut.com/setup

Cricut Design Space Login

Cricut machine

how to setup cricut maker

8 Unique Cricut Thanksgiving Projects 2023

After celebrating Halloween, Cricut Thanksgiving projects keep crafters on track to continue their crafting. Whether you are hosting an intimate family gathering or celebrating a larger party, these Cricut Thanksgiving crafts will add a personal touch to the decor. With the festival only a week away, I’m excited because I want to take advantage of this golden opportunity to make custom projects on my own.

However, with my do-it-yourself ideas, renovating my home for this special occasion will become more manageable for me. Are you having trouble deciding which project will be the best for your environment? Then, I am here to solve this puzzle for you. Some of my favorite Thanksgiving crafts that you can make with a craft plotter are available below.

1.  Candle Holder

If you want to have a romantic dinner date with your partner, then try to create a custom candle holder. With one of these Cricut Thanksgiving projects, you can not only make the table look more graceful and appealing, but you will also be able to share your inner feelings without any shyness.

Alt Text: Candleholders

2.  Custom Pillow

Further, make your guests comfortable by arranging customized pillows on your couch or sofa. Apart from that, you can also keep the pillows in your wardrobe and reuse them for next year. It would help if you had a Cricut Maker, iron-on vinyl, blanks, and other supplies to make your pillows. Other than that, you can also add text, making the guest feel at home and sharing festive vibes.

Alt Text: A customized pillow

3.  Frame

Designing a personal frame is also one of the best Cricut Thanksgiving ideas. With the frame by the side, I can save precious moments for a more extended period. However it seemed harsh in the beginning, but soon, I was able to access my craft plotter and made my first personalized frame. Now, to enlighten you more, I chose Cricut Maker as a cutting machine and cardstock as a material. However, it will be your decision which craft plotter you will be using to create the frame.

Alt Text: A DIY Frame for Thanksgiving

4.  DIY Shirt

In addition, if you want to look perfect on Thanksgiving, then you should give it a shot by designing a customized shirt. After wearing the shirt, you will become the center of attraction for everyone. Other than that, the DIY shirt will also show your artistic side to everyone. Now, to create one of these Cricut Thanksgiving designs, you need to have Cricut Explore along with Design Space, tools, and Heat Press.

Alt Text: Personalize the “Happy Thanksgiving” logo shirt

5.  Napkin Rings

Are you a person who loves to organize dining tables for any occasion? Then, you must be aware of the napkin rings. If you are a crafter, then you can design your own Thanksgiving napkin rings. Through this list of Cricut Thanksgiving projects, one can give shape to the time as per their napkin size. Besides, you can create napkin rings with Cricut Joy in just minutes.

Alt Text: A custom napkin ring

6.  Coasters

Give your dining area a new look with Cricut Thanksgiving designs for designing personalized coasters. Also, the coasters will help you transform your dinner table into eye-catching and breathtaking. In addition, you can make these Cricut ideas for Thanksgiving with Cricut Explore Air 2 and Heat Press, along with tools and supplies. Besides, you can gift them as a token of love to your guests.

Alt Test: Coasters for Thanksgiving

7.  Apron

If you love to cook, then the kitchen must be your favorite place to spend time. Talking about the list of Cricut Thanksgiving projects, I know it’s tough to keep your clothes safe while cooking. I want to say that the apron makes me feel like a chef, and everything is under their control. If you are passionate about crafting, then try to design a customized apron. Just like me, you can also save money by making a personalized apron. For that, you need a Cricut Maker 3, Heat Press, and accessories.

Alt Text: DIY Thanksgiving Apron

8.  Cutting Board

To keep my kitchen surface safe while chopping, I decided to create a personal cutting board for my kitchen. Among the vast choices of Cricut Thanksgiving projects, I preferred this craft. No doubt, the board has encouraged me to think of something creative and unique and share my crafting skills. You can make the board with your choice of wood and stencils with the Cricut Venture.

Alt Text: A cutting board for Thanksgiving

With such a fantastic choice of Cricut Thanksgiving ideas, you will be able to make this festival unforgettable.

Frequently Asked Questions

Question: Can I Make Money with Cricut Thanksgiving Crafts?

Answer: Yes, it is possible to make money with Cricut crafts. If you are a dedicated crafter, you can create and then sell it to the buyers. Apart from that, you need to ensure that you’ve all the crucial supplies with you while doing the projects. By selling the Thanksgiving projects, you can also start your own business or expand it.

Question: What Cricut Thanksgiving Projects Can I Make with My Cricut Machine?

Answer: It doesn’t matter whether you are a beginner or an expert in accessing the craft plotter. Some of the fantastic Cricut crafts that you can make and give to your loved one are as follows:

  • DIY shirt
  • Napkin rings
  • Coasters
  • Apron
  • Cutting board
  • Gloves
  • Banner
  • Wood sign
  • Doormat
  • Personal baby bib
  • Hat
  • Custom gift bag

Question: What Supplies Are Needed to Make Cricut Projects for Thanksgiving?

Answer: If you are planning to make Thanksgiving projects with the Cricut machine, then you need some of the crucial supplies. They will help them in molding the craft as per their choice. Some of the primary supplies are as follows:

  • Cricut cutting machine
  • Design Space
  • Cricut tools and accessories
  • Cricut cutting mat
  • Material
  • Cricut blanks
  • Cricut pens & markers
  • Transfer tape & tools set

Source URL: – Cricut Thanksgiving projects

Visit – Cricut.com/setup
Cricut Design Space Login
Cricut thanksgiving crafts
Cricut thanksgiving ideas
Install Cricut Design Space app

Design a site like this with WordPress.com
Get started